 Toyota Land Cruiser Service ManualAir conditioning » Compressor and magnetic clutch
Disassembly
Disassembly
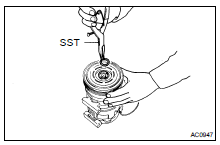
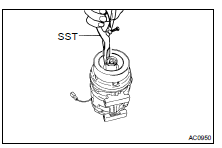
1. REMOVE PRESSURE PLATE
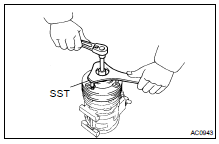
(a) Using SST and a socket wrench, remove the shaft bolt.
Torque: 13.2 N·m (135 kgf·cm, 9 ft·lbf)
SST 07112-76060
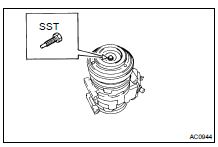
(b) Install SST on the pressure plate.
SST 07112-66040
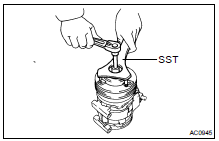
(c) Using SST and socket wrench, remove the pressure plate.
SST 07112-66040, 07112-76060
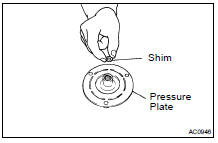
(d) Remove the shims from the pressure plate
2. REMOVE ROTOR
(a) Using SST, remove the snap ring.
SST 95994-10020
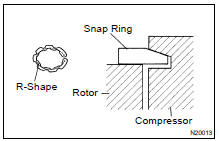
NOTICE: At the time of reassembly, the snap ring should be installed so that beveled side facing up.
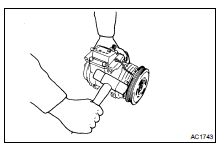
(b) Using a plastic hammer, tap the rotor off the shaft.
NOTICE: Be careful not to damage the pulley when tapping on the rotor.
3. REMOVE STATOR
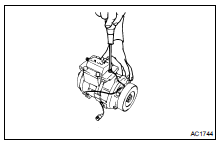
(a) Disconnect the stator lead wire from the compressor housing.
(b) Using SST, remove the snap ring.
SST 95994-10020
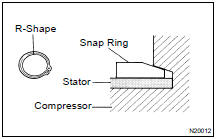
NOTICE: At the time of reassembly, the snap ring should be installed so that its beveled side facing up.
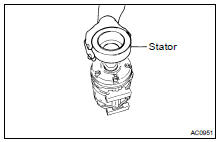
(c) Remove the stator.
Disassembly
Installation
On-vehicle inspection
Reassembly
Removal
Toyota Land Cruiser Service Manual
Categories
