 Toyota Land Cruiser Service ManualBody Mechanical » Windshield
Removal
Removal
1. REMOVE FRONT DOOR OPENING TRIMS
2. REMOVE FRONT ASSIST GRIP
(a) Using a screwdriver, remove the 2 assist grip plugs, then remove the 2 screws and the front assist grip.
HINT: Tape up the screwdriver tip before use.
(b) Use the same manner described above to the other side.
3. REMOVE FRONT PILLAR GARNISH
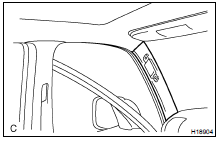
(a) Using a screwdriver, remove the front pillar garnish.
HINT: Tape up the screwdriver tip before use.
(b) Use the same manner described above to the other side.
4. REMOVE SUN VISOR
(a) Using a screwdriver, remove the caps.
HINT: Tape up the screwdriver tip before use.
(b) Remove the screws, then disconnect the connectors.
(c) Remove the sun visors.
5. REMOVE DOUBLE VISOR
Remove the screws and the double visors.
6. REMOVE HOLDER
Remove the screws and the holders.
7. REMOVE OVERHEAD CONSOLE BOX
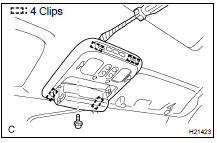
(a) Remove the bolt.
(b) Using a screwdriver, remove the overhead console box, then disconnect the connector.
HINT: Tape up the screwdriver tip before use.
8. REMOVE ASSIST GRIPS
9. PULL DOWN FRONT SIDE OF ROOF HEADLINING
10. REMOVE INNER REAR VIEW MIRROR
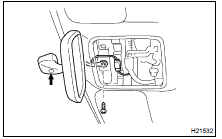
(a) Disconnect the connector.
(b) Unfasten a screw, and remove the other screw and the inner rear view mirror.
11. REMOVE WIPER ARMS
(a) Remove the 2 wiper arm head caps and the 2 nuts.
(b) Remove the 2 wiper arms.
12. REMOVE HOOD TO COWL TOP SEAL
13. REMOVE COWL TOP VENTILATOR LOUVERS
(a) Remove the cowl top ventilator louver RH.
(b) Remove the cowl top ventilator louver LH.
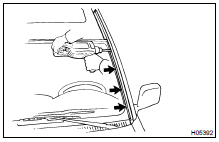
14. REMOVE OUTSIDE NO. 2 MOULDING
(a) Using a screwdriver, remove the outside No. 2 moulding.
HINT: Tape up the screwdriver tip before use.
(b) Using a drill of less then ø 4 mm (0.16 in.).
(c) Gently and vertically put the drill to the rivet and cut the rivet flanges.
NOTICE:
- Prizing the hole with a drill can lead to damage to the rivet hole or breaking the drill.
- Take cafe as the cut rivet is hot.
(d) Even if flange is taken off, continue drilling and push out remaining fragments with the drill.
(e) Using a heat light, heat the moulding to 20 - 30 C (68 - 86 F).
NOTICE: Do not heat the moulding excessively.
(f) Tie both piano wire ends to wooden blocks or similar objects.
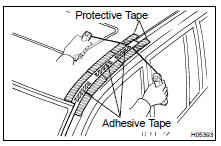
(g) Cut the adhesive tape by pulling the piano wire as shown.
NOTICE:
- If reusing the moulding, take care not to damage the moulding.
- Do not damage the body.
HINT: Apply protective tape to the outer surface to keep the surface from being scratched.
(h) Remove the moulding.
(i) Use the same manner described above to the other side.
15. REMOVE OUTSIDE UPPER MOULDING
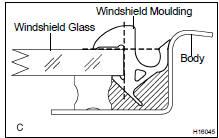
Using a knife, cut off the moulding as shown in the illustration.
NOTICE: Do not damage the body with the knife.
16. REMOVE WINDSHIELD GLASS
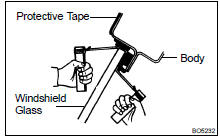
(a) Push piano wire through between the body and glass from the interior.
(b) Tie both wire ends to wooden blocks or similar objects.
HINT: Apply protective tape to the outer surface to keep the surface from being scratched.
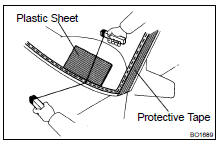
NOTICE: When separating the glass, take care not to damage the paint and interior and exterior ornaments. To prevent scratching the safety pad from scratching when removing the windshield, place a plastic sheet between the piano wire and the safety pad.
(c) Cut the adhesive by pulling the piano wire around it.
(d) Remove the windshield glass.
NOTICE: Leave as much of the adhesive on the body as possible when cutting the glass.
Installation
Removal
Toyota Land Cruiser Service Manual
Categories
