 Toyota Land Cruiser Service ManualBody Mechanical » Sliding roof
Disassembly
Disassembly
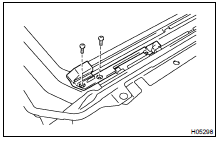
1. REMOVE REAR DRIP CHANNEL
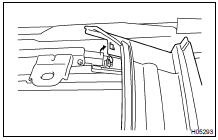
(a) Using a screwdriver, remove the front side of rear drip channel.
HINT: Tape the screwdriver tip before use.

(b) Remove the rear drip channel as shown in the illustration.
2. REMOVE SLIDING ROOF PANEL STOPPERS
Remove the 2 screws and 2 stoppers.
3. REMOVE SUNSHADE TRIM
4. REMOVE DRIVE CABLE
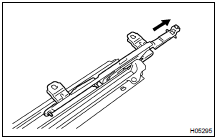
(a) Remove the screw and guide rail stopper.
(b) Slide the drive cable rearward, then remove it.
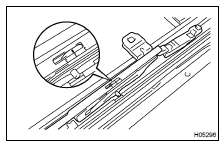
HINT: At the time of reassembly, please refer to the following items.
- Adjust the drive cable to a closed and tilted down position.
- Slide the cable forward or backward to align the 2 marks as shown.
- Slide the cable to the forefront with your hand.
(c) Employ the same manner described above to the other side.
5. REMOVE WIND DEFLECTOR PANEL
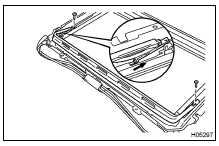
Remove the 2 screws and wind deflector panel as shown in the illustration.
6. REMOVE GUIDE BLOCK
(a) Remove the 2 screws and guide block.
(b) Employ the same manner described above to the other side.
7. REMOVE SLIDING ROOF HOUSING
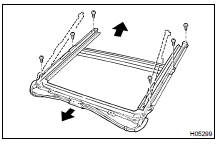
Remove the 6 screws and sliding roof housing.
8. REMOVE CABLE GUIDE CASING
INSTALLATION
Installation is in the reverse order of removal
Adjustment
Disassembly
On-vehicle inspection
Removal
Toyota Land Cruiser Service Manual
Categories
