 Toyota Land Cruiser Service ManualBody Mechanical » Sliding roof
Removal
Removal
1. REMOVE ROOF HEADLINING ( BO-97 )
2. REMOVE SIDE GARNISH
(a) Using a screwdriver, remove the garnish.
HINT: Tape the screwdriver tip before use.
(b) Employ the same manner described above to the other side.
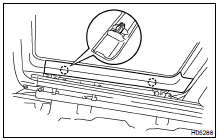
3. REMOVE FRONT AND REAR GARNISHES
Using a screwdriver, remove the front and rear garnishes.
HINT: Tape the screwdriver tip before use.
4. REMOVE SLIDING ROOF GLASS
(a) Remove the 4 nuts.
(b) Pull the glass upward to remove it.
5. REMOVE DRIVE GEAR
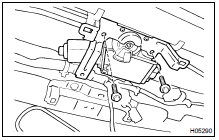
NOTICE: Remove the drive gear with the sliding roof fully closed.
(a) Disconnect the connector.
(b) Remove the 2 bolts and drive gear.
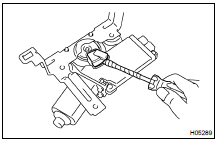
(c) Using a screwdriver, remove the cam plate cover.
HINT: Tape the screwdriver tip before use.
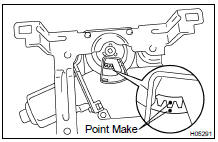
(d) Turn the drive gear to align the point marks as shown in the illustration.
(e) Install the cam plate cover.
NOTICE: At the time of installation, please refer to the following item.
If the sliding roof position and drive gear fully closed position are not matched, the sliding roof does not operate normally.
6. REMOVE SLIDING ROOF HOUSING
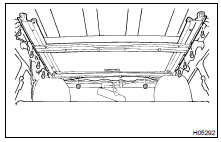
(a) Remove the 4 drain hoses from the housing.
(b) Disengage the room light wire harness clamps.
(c) Remove the 8 bolts, 2 nuts and sliding roof housing.
Adjustment
Disassembly
On-vehicle inspection
Removal
Toyota Land Cruiser Service Manual
Categories
