 Toyota Land Cruiser Service ManualTransfer » Front extension housing
Reassembly
Reassembly
HINT: Coat all of the sliding and rotating surfaces with gear oil before reassembly.
1. INSTALL DUST DEFLECTOR
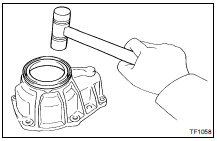
(a) Using a plastic hammer, install a new dust deflector to the front extension housing.
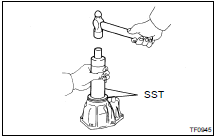
(b) Using SST and a press, install a new dust deflector to the front output shaft.
SST 09316-2001 1, 09316-60011 (09316-00011)
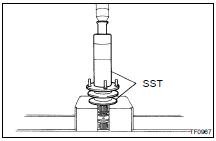
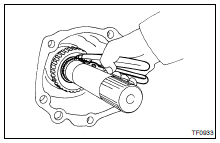
2. INSTALL BALL BEARING
(a) Using SST and a press, install the ball bearing to the front extension housing.
SST 09316-6001 1 (09316-00011, 09316-00031)
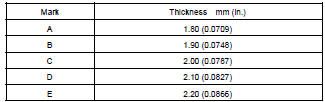
(b) Select a snap ring that will allow the minimum axial play.

(c) Using a screwdriver, install a new snap ring.
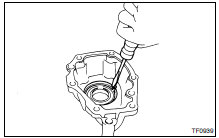
3. INSTALL OIL SEAL
(a) Apply MP grease to the lip of a new oil seal.
(b) Using SST and a hammer, drive in a new oil seal to the front extension housing.
SST 09316-6001 1 (09316-00011, 09316-00061)
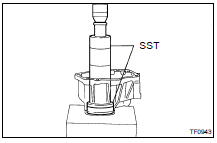
4. INSTALL FRONT OUTPUT SHAFT AND DRIVE CLUTCH HUB
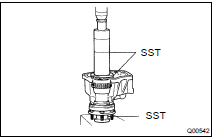
(a) Using SST and a press, install the front output shaft and drive clutch hub.
SST 09316-2001 1, 09316-60011 (09316-00011, 09316-00041, 09316-00071)
(b) Select a snap ring that will allow the minimum axial play.
(c) Using a snap ring expander, install a new snap ring.
Disassembly
Reassembly
Toyota Land Cruiser Service Manual
Categories
