 Toyota Land Cruiser Service ManualBody Mechanical » Seat belt
Inspection
Inspection
CAUTION: Replace the seat belt assembly (outer belt, inner belt, bolts, nuts or sill-bar) if it has been used in a severe impact. The entire assembly should be replaced even if damage is not obvious.
1. Except manual type: RUNNING TEST (IN SAFE AREA)
(a) Fasten the front seat belts.
(b) Drive the car at 10 mph (16 km/h) and slam on the brakes.
Check that the belt locks and cannot be extended at this time.
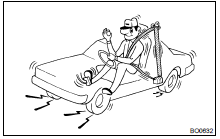
HINT: Conduct this test in a safe area. If the belt does not lock, remove the belt mechanism assembly and conduct the following static check. Also, whenever installing a new belt assembly.
2. Driver's seat belt (ELR): STATIC TEST
(a) Make sure that the belt locks when pulled out quickly.
(b) Remove the locking retractor assembly.
HINT: Before removing the pretensioner connector, be sure to read the precautionary notice in the RS section.
(c) Tilt the retractor slowly.
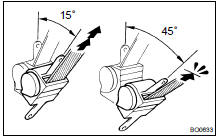
(d) Make sure that the belt can be pulled out at a tilt of 15 degrees or less, and cannot be pulled out over 45 degrees of tilt.
If a problem is found, replace the assembly.
3. Except driver's seat belt (ELR/ALR): STATIC TEST
(a) Make sure that the belt locks when pulled out quickly.
(b) Remove the locking retractor assembly.
HINT: Before removing the pretensioner connector, be sure to read the precautionary notice in the RS section.
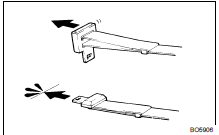
(c) Pull out the whole belt and measure the length of the whole belt.
Then retract the belt slightly and pull it out again
(d) Make sure that the belt cannot be extended further.
If a problem is found, replace the assembly.
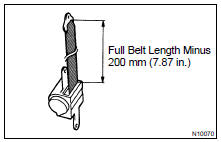
(e) Retract the whole belt, then pull out the belt until 200 mm (7.87 in.)of the belt remaining in the retractor.
(f) Tilt the retractor slowly.

(g) Make sure that the belt can be pulled out at a tilt of 15 degrees or less, and cannot be pulled out at over 45 degrees of tilt.
If a problem is found, replace the assembly.
4. Manual type: TESTING
(a) Adjust the belt to the proper length.
(b) Apply a firm load to the belt.
(c) Make sure that the belt does not extend.
5. INSPECT REAR NO. 1 SEAT CENTER BELT
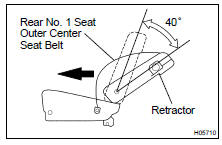
(a) After pulling out 300 mm (11.81 in.) of the seat belt, check that the belt is locked when pulled out quickly.
(b) Check that the belt can be pulled out 300 mm (11.81 in.) without being locked when the seat is reclined as shown in the illustration.
(c) Check that the belt is locked when the belt is pulled out by a certain amount under (a) condition.
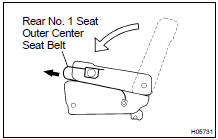
(d) When folding down the seatback forward and extracting the seat belt slowly, check that the belt is locked after a certain length (approx. 500 mm (19.69 in.)) of the belt has been extracted.
Side step
Components
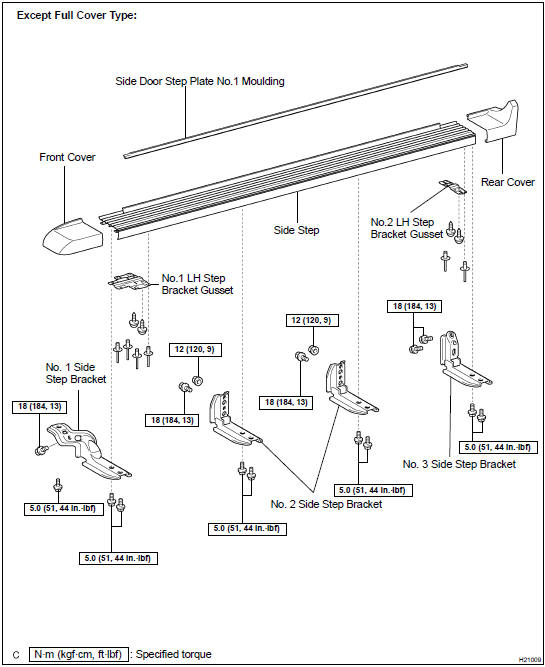
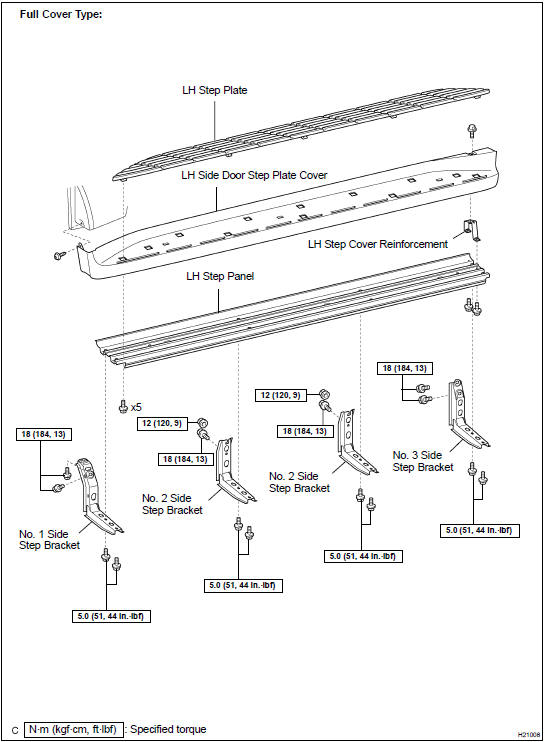
Components
Inspection
Toyota Land Cruiser Service Manual
Categories
