 Toyota Land Cruiser Service ManualBody Mechanical » Rear No.1 Seat (LH)
Disassembly
Disassembly
1. REMOVE HEADRESTS
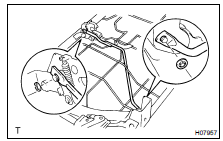
2. REMOVE SEATBACK BOARD
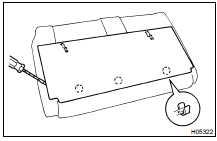
Using a screwdriver, remove the seatback board as shown in the illustration.
HINT: Tape the screwdriver tip before use.
3. REMOVE RECLINING ADJUSTER RELEASE HANDLE
(a) Using a screwdriver, remove the cover.
HINT: Tape the screwdriver tip before use.
(b) Remove the screw and reclining adjuster release handle.
4. REMOVE NO. 1 RECLINING COVERS
(a) Remove the 4 hog rings and open the seatback cover.
HINT: At the time of reassembly, please refer to the following item.
When installing hog rings, take care to prevent wrinkles as little as possible.
(b) Remove the 2 corner pads.
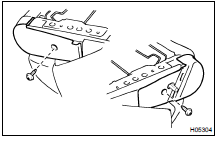
(c) Remove the 2 screws and 2 No. 1 reclining covers as shown in the illustration.
5. REMOVE SEAT CUSHION UNDER COVERS
Remove the 2 screws and 2 seat cushion under covers.
6. REMOVE SEAT CUSHION UNDER COVER SUB-ASSEMBLY
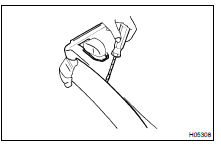
(a) Using a screwdriver, disengage the hooks as shown in the illustration.
HINT: Tape the screwdriver tip before use.

(b) Remove 10 screws and seat cushion under cover subassembly.
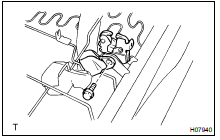
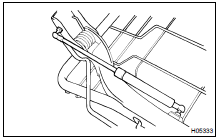
7. REMOVE NO. 1 FOLD SEAT LOCK CONTROL CABLE
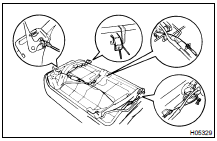
Remove the 2 clamps and No. 1 fold seat lock control cable as shown in the illustration.
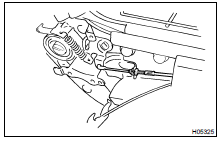
8. REMOVE RH NO. 1 SEAT LEG STAY
Using a screwdriver, remove the 2 E-rings and No. 1 seat leg stay.
HINT: Tape the screwdriver tip before use.
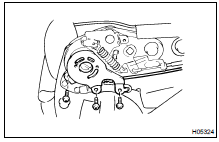
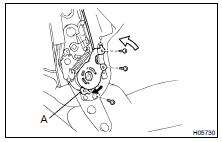
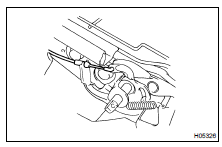
9. REMOVE RH REAR SEAT LOCK
(a) Remove the screw and rear seat lock cover.
(b) Remove the bolt, seat belt anchor and inner belt.
Torque: 42 N·m (430 kgf·cm, 31 ft·lbf)
(c) Remove the RH rear seat lock.
10. REMOVE SEATBACK ASSEMBLY
(a) Remove the 3 screws and seat belt reclining detecting part.
Torque: 3.9 N·m (40 kgf·cm, 35 in.·lbf)
HINT: At the time of reassembly, please refer to the following items.
- Tighten the 2 screws on the seatback side.
- Fold down the seatback forward and raise it up to the first lock position.
- Turn A to the rear side of the seat cushion for initial positioning.
- Check visually that the reference holes are penetrated.
- Tighten the screws on the cushion side of seat belt reclining detecting part.
(b) Loosen the nut, remove the reclining connecting wire of LH side edge.
(c) Remove the reclining connecting wire of RH side edge.

(d) Remove the 4 bolts and seatback assembly.
Torque: 41 N·m (420 kgf·cm, 30 ft·lbf)
11. w/ Armrest: REMOVE ARMREST
(a) Remove the 2 nuts and armrest.
(b) Remove the 2 screws and 2 hinge covers.
(c) Remove the 2 bolts and hinges.
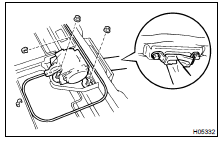
12. REMOVE SEATBACK FRAME
(a) Using a screwdriver, remove the rear seat shoulder belt cover.
HINT: Tape the screwdriver tip before use.
(b) Remove the 4 headrest supports.
(c) Disengage the hooks, remove the seatback frame.
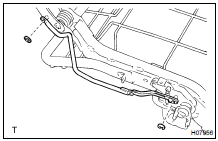
13. REMOVE SEAT ADJUSTER CONTROL CABLE
14. REMOVE REAR SEAT OUTER BELT
(a) Remove the 2 bolts and rear seat shoulder belt guide.
Torque: 42 N·m (430 kgf·cm, 31 ft·lbf)
HINT: At the time of reassembly, please refer to the following item.
Install the shoulder belt guide to the seatback frame with a slit the guide facing to the rear side of the vehicle.
(b) Remove the 2 nuts and rear seat outer belt.
Torque: 42 N·m (430 kgf·cm, 31 ft·lbf)
15. REMOVE NO. 1 PROTECTOR
16. REMOVE SEATBACK COVER
Remove the hog rings and seatback cover.
HINT: At the time of reassembly, please refer to the following item.
When installing hog rings, take care to prevent wrinkles as little as possible.
17. REMOVE SEAT CUSHION FRAME
Remove the hog rings and seat cushion frame.
HINT: At the time of reassembly, please refer to the following item.
When installing hog rings, take care to prevent wrinkles as little as possible.
18. REMOVE REAR NO. 1 SEAT ADJUSTER
(a) Remove the 2 bolts and rear No. 1 seat outer adjuster.
Torque: 41 N·m (420 kgf·cm, 30 ft·lbf)
(b) Remove the 2 bolts and rear No. 1 seat inner adjuster.
Torque: 41 N·m (420 kgf·cm, 30 ft·lbf)
(c) Remove the 2 hinge covers from the outer and inner adjuster.
19. REMOVE REAR SEAT STAY
Remove the 2 bolts and rear seat stay.
20. REMOVE LH NO. 1 SEAT LEG STAY
Using a screwdriver, remove the spring nut, E-ring and LH No.
1 seat leg stay.
21. REMOVE REAR SEAT CUSHION HINGE
(a) Using a screwdriver, remove the spring nut and E-ring.
(b) Remove the 2 hinge pins, 2 cushion spacers, 2 cushion support springs and 2 rear seat cushion hinges.
22. REMOVE LH REAR SEAT LOCK
Unfasten the bolt, then remove the inner belt and LH rear seat lock.
INSTALLATION
Installation is in the reverse order of removal
Disassembly
Removal
Toyota Land Cruiser Service Manual
Categories
