 Toyota Land Cruiser Service ManualAir conditioning » Air conditioning control assembly
Removal
Removal
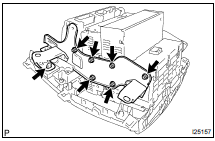
1. REMOVE CENTER RESISTORS

Disengage the 12 clips and remove the center resistors, then disconnect the connectors.
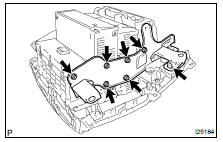
2. REMOVE INTEGRATION CONTROL PANEL ASSEMBLY
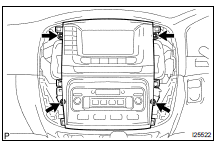
(a) Remove the 4 bolts.
(b) Remove the integration control panel assembly, then disconnect the connectors.
3. w/ navigation system: REMOVE A/C AMPLIFIER
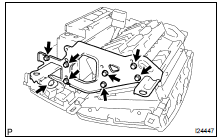
(a) Disconnect the connector clamp.
(b) Remove the 3 screws, the 4 bolts and the radio receiver bracket LH.
(c) Remove the 2 screws and the A/C amplifier.
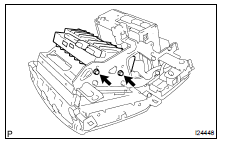
4. w/ LEXUS navigation system: REMOVE EMV

Remove the 3 screws, the 2 bolts and the EMV.
5. w/ navigation system: REMOVE INTEGRATION CONTROL PANEL
6. Disconnect the connector clamps.
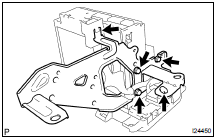
(a) Remove the screw, the 2 bolts and the radio receiver bracket RH.
(b) Remove the integration control panel from the radio receiver.
7. w/o navigation system: REMOVE INTEGRATION CONTROL PANEL
(a) Disconnect the connector clamp.
(b) Remove the 2 screws, 4 bolts and the radio receiver bracket LH.
(c) Disconnect the connector clamp.
(d) Remove the 2 screws, 4 bolts and the radio receiver bracket RH.
(e) Remove the integration control panel.
Components
Disassembly
Inspection
Installation
Removal
Toyota Land Cruiser Service Manual
Categories
