 Toyota Land Cruiser Service ManualBody Mechanical » Front seat
Disassembly
Disassembly
1. REMOVE HEADREST
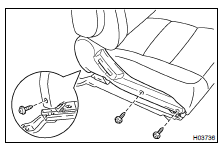
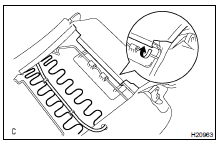
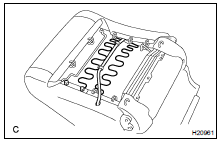
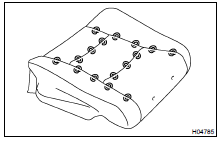
2. REMOVE SEATBACK BOARD
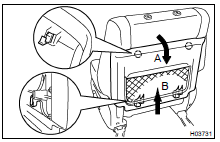
Remove the seatback board as shown in the illustration.
HINT: Remove the seatback board in the order of "A" and "B" as shown in the illustration.
3. REMOVE SEAT CUSHION OUTER SHIELD
(a) Using a screwdriver, remove the power seat switch knobs.
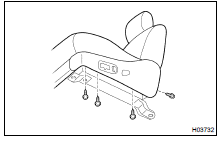
HINT: Tape up the screwdriver tip before use.
(b) Remove the 4 screws.
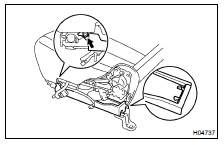
(c) Disconnect the connectors as shown in the illustration.
(d) Remove the seat cushion outer shield.
(e) Remove the 3 screws and the power seat switch from the seat cushion outer shield.
(f) Remove the 2 screws and lumber support switch from the seat cushion outer shield.
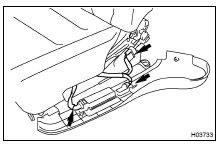
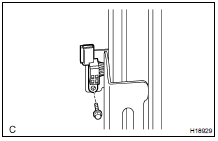
4. REMOVE FRONT SEAT INNER BELT
(a) Remove the clamp, then disconnect the connector.
(b) Remove the bolt and the inner belt.
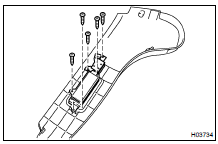
5. REMOVE SEAT CUSHION INNER SHIELD
Remove the 3 screws and the seat cushion inner shield.
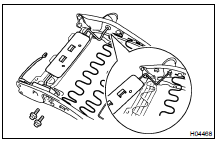
6. REMOVE LOWER SEAT CUSHION SHIELD
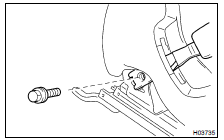
Remove the screw and the lower seat cushion shield as shown in the illustration.
7. REMOVE FRONT SEAT CUSHION SHIELD

Remove the screw and the front seat cushion shield.
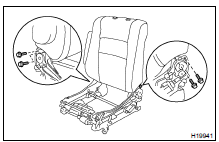
8. REMOVE SEAT CUSHION ASSEMBLY
(a) Remove the 4 bolts.
(b) Remove the clamps from the seat cushion assembly.
9. REMOVE SEAT CUSHION FRAME
(a) Disengage the hook.
(b) Remove the hog rings and the seat cushion frame from the seat cushion cover with pad.
10. REMOVE SEAT CUSHION COVER ( BO-1 10)
11. IF NECESSARY, REPLACE SEAT CUSHION HEATER ( BO-1 10)
12. REMOVE SEATBACK ASSEMBLY
(a) Remove the hog rings.
(b) Disengage the hook as shown in the illustration.
(c) Disconnect the connectors.
(d) Remove the 4 bolts and the seatback assembly.
NOTICE: When handling the airbag connector take care not to damage the airbag wire harness.
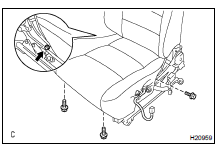
(e) Remove the screw and the RH reclining adjuster inside shield.
(f) w/ Side Airbag: Disconnect the side airbag connector.
NOTICE: When handling the airbag connector take care not to damage the airbag wire harness.
(g) Remove the screw and the LH reclining adjuster inside shield.
13. REMOVE ARMREST
14. w/o Side Airbag: REMOVE SEATBACK FRAME

(a) Remove the hog rings.
(b) Remove the 2 headrest supports.
(c) Remove the seatback frame from the seatback cover with pad.
15. w/ Side Airbag: REMOVE SEATBACK FRAME
(a) Remove the hog rings, the clamps and the 2 bolts.
(b) Remove the 2 headrest supports.
(c) Remove the seatback frame from the seatback cover with pad.
16. REMOVE LUMBER SUPPORT
Remove the 2 bolts, the lumber support and the spacer.
17. REMOVE SEATBACK COVER
Remove the hog rings and the seatback cover from the seatback pad.
18. IF NECESSARY, REPLACE SEATBACK HEATER ( BO-1 10)
19. REMOVE SEAT POSITION CONTROL RELAY
(a) Disconnect the connectors.
(b) Remove the 2 bolts and the seat position control relay.
20. Driver's Side: REMOVE SEAT POSITION SENSOR
Remove the bolt and the seat position sensor then disconnect the connector.
INSTALLATION
Installation is in the reverse order of removal
Disassembly
Reassembly
Removal
Replacement
Toyota Land Cruiser Service Manual
Categories
